
How to Straighten Curly Hair: A Complete Guide for DIY Results
Contents:
- Why Straightening Curly Hair Requires a Different Approach
- Preparing Your Hair for Straightening
- Step 1: Deep Condition First
- Step 2: Shampoo with a Smoothing Shampoo
- Step 3: Apply Leave-in Conditioner
- Step 4: Apply Heat Protectant
- Blow-Drying: Your Secret Weapon
- Why Blow-Drying Matters Before Straightening
- Choosing and Using a Hair Straightener
- Plate Material Matters
- Temperature Guide for Curly Hair
- The Straightening Technique
- Common Mistake: Straightening vs. Relaxing
- Finishing Touches for Long-Lasting Smoothness
- Sealing the Cuticle
- Humidity Control
- Overnight Maintenance for Multi-Day Wear
- Care Tips After Straightening
- Frequently Asked Questions
- How long does straightened curly hair last?
- Will straightening permanently damage my curls?
- Can I straighten my hair if it’s dyed or bleached?
- What’s the cheapest way to straighten curly hair at home?
- Can I straighten curly hair without heat?
- Final Thoughts: Embrace Your Options
Curly hair is beautiful—but sometimes you want a sleek, straight look. The good news? You absolutely can transform your curls into silky strands without damaging your hair or spending hundreds at the salon. Whether you’re prepping for a special occasion in summer 2026 or simply fancy a change, this guide walks you through everything you need to know about straightening curly hair the right way.
Why Straightening Curly Hair Requires a Different Approach
Curly hair has a unique structure. The hair shaft is spiral-shaped, and the outer cuticle layer is slightly raised, which is why curls hold their form so naturally. When you want to straighten curly hair, you’re essentially reversing this structure temporarily. This matters because it means using generic straightening advice from people with naturally straight hair won’t work as well for you.
I once helped a mate who’d never attempted straightening before. She grabbed a cheap £20 straightener from a high street shop and went at her shoulder-length curls without prep or protection. The result? Frizzy, heat-damaged mess. That’s when I realised just how critical the preparation phase is. Proper prep—the right shampoo, conditioning, heat protection—makes the difference between a gorgeous result and a disaster.
Curly hair is also more porous than straight hair, meaning it absorbs moisture more readily. This is why your straightened curls can revert if humidity levels spike—which is exactly why timing matters. Spring and summer in the UK (roughly April to August) mean higher moisture in the air, so you’ll need stronger frizz control during those months compared to winter.
Preparing Your Hair for Straightening
Step 1: Deep Condition First
Start at least two days before straightening. Apply a deep conditioning treatment, focusing on the mid-lengths and ends. Leave it on for 15–20 minutes. Curly hair needs moisture to stay healthy during the straightening process. A product like Cantu Shea Butter Deep Conditioning Mask (around £6–8) or SheaMoisture’s intensive conditioner works well. Heat will temporarily dry your hair, so pre-loading moisture acts as a buffer.
Step 2: Shampoo with a Smoothing Shampoo
On the day you straighten, use a smoothing or keratin-based shampoo. These products help seal the cuticle layer and reduce frizz. Skip volumising shampoos, which can make curls spring back up. A good option is OGX Quenching+ Coconut Curls or Cantu Sulfate-Free shampoo (both around £4–5 per bottle). Massage gently and rinse thoroughly with lukewarm water.
Step 3: Apply Leave-in Conditioner
While your hair is still damp, apply a leave-in conditioner. This provides slip—essential for the straightening tool to glide smoothly—and adds an extra layer of moisture. Expect to use about a quarter-sized amount, distributed through your hair. Let it sit for 5 minutes.
Step 4: Apply Heat Protectant
This is non-negotiable. A heat protectant spray or cream shields your hair from temperatures that can exceed 200°C. Spray it generously throughout your damp hair, making sure to coat every section. Popular options include:
- Tresemmé Heat Tamer Spray (£3–4)
- GHD Heat Protect Spray (£20)
- Bonacure Oil in Lotion (£12–15)
The heat protectant dries on your hair and forms a protective barrier. Don’t skip this step—it prevents protein loss and breakage.
Blow-Drying: Your Secret Weapon
Why Blow-Drying Matters Before Straightening
Many people jump straight to a straightening iron on wet hair. That’s a mistake. Blow-drying first reduces the work your straightener has to do and minimises heat exposure. It also partially relaxes the curl pattern, making the straightening iron’s job much easier.
Use a blow-dryer with a concentrator nozzle (the narrow attachment that focuses airflow). Set it to medium-high heat, never the highest setting. If your hair is very curly, use a round brush to gently smooth sections as you dry. Work section-by-section, drying about 70–80% of the way through. Your goal is damp hair, not bone-dry, because completely dry hair is more prone to frizz.
Time required: 15–25 minutes, depending on thickness and length. A powerful dryer like the Dyson Supersonic (£299) will cut this time in half compared to a basic model, though a decent ionic dryer from Boots for £30–50 works fine.
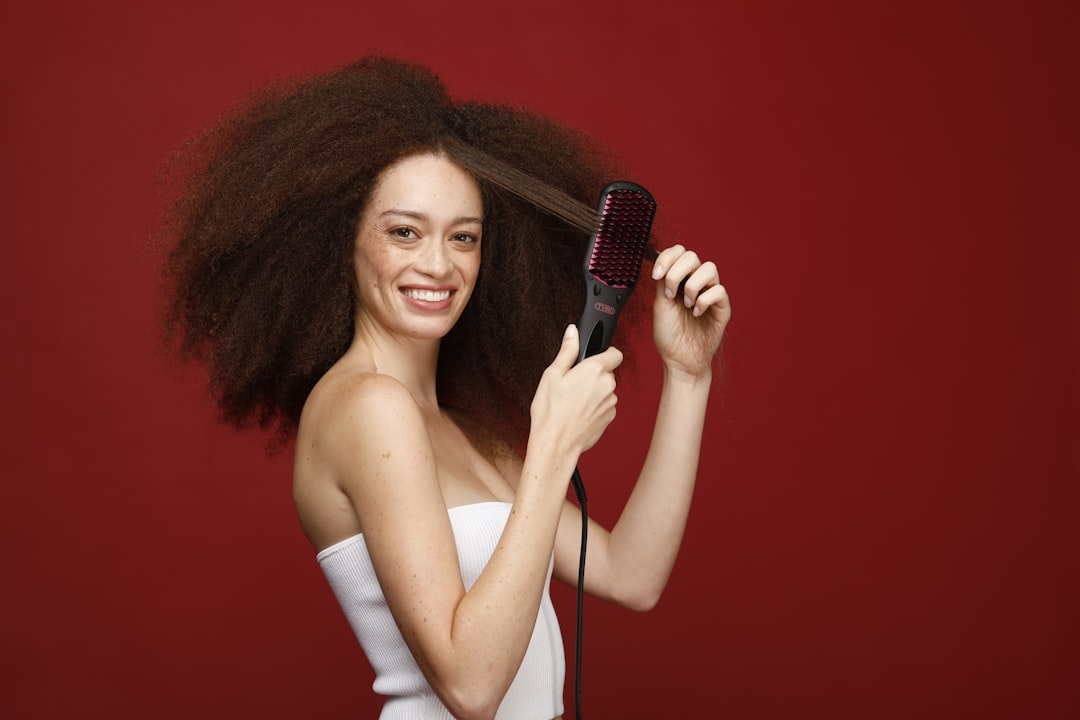
Choosing and Using a Hair Straightener
Plate Material Matters
Not all straighteners are equal. Curly hair benefits from:
- Ceramic or tourmaline plates: Distribute heat evenly, reducing hot spots that cause damage. Ceramic plates are gentler; tourmaline plates ionise the hair and reduce frizz further.
- Wide plates (1 inch or wider): Cover more surface area in fewer passes, reducing heat exposure.
- Adjustable temperature: Essential for curly hair. You should be able to dial between 150°C and 200°C depending on your hair thickness.
Avoid cheap straighteners with metal plates. They create hot spots and damage curly hair faster. Invest £40–80 in a decent straightener. Popular options include the GHD Gold (£189), Cloud Nine original iron (£119), or the Revlon One-Step (£50 on sale).
Temperature Guide for Curly Hair
Here’s where specifics matter:
- Fine or delicate curls: 150–170°C
- Medium texture: 170–185°C
- Thick or very curly hair: 185–200°C
Start low and work up. You’ll know the temperature is right when the straightener smooths your hair in a single pass without sizzling. If you hear sizzling, it’s too hot.
The Straightening Technique
Divide your hair into four sections: two at the front (near your temples) and two at the back. Clip three sections away. Work on one section at a time.
- Take a subsection about 1 inch wide.
- Starting 1 inch from the roots (never right at the scalp—you’ll burn yourself), clamp the straightener and slowly glide it down to the ends. Move at a steady pace—roughly 2–3 seconds per pass from roots to tips.
- If the curl isn’t fully straightened after one pass, do a second pass. A third pass risks heat damage.
- Once straightened, immediately run your fingers through the section to cool it slightly. This helps the straight structure set.
- Move to the next subsection and repeat.
Total time: 20–40 minutes depending on hair thickness and length. The key is patience. Rushing leads to uneven results and heat damage.
Common Mistake: Straightening vs. Relaxing
People often confuse straightening with chemical relaxing. Here’s the difference: straightening with heat is temporary—it lasts until your next wash. Chemical relaxing permanently alters the hair structure using alkaline chemicals. Chemical relaxing can cost £50–150+ and requires professional application. It also carries higher damage risk, especially for curly or textured hair.
Heat straightening is reversible, safer, and cheaper. Your curls return after washing, so you have flexibility. This is why most DIY enthusiasts prefer the straightening iron method—it’s forgiving if you make a mistake.
Finishing Touches for Long-Lasting Smoothness
Sealing the Cuticle
Once you’ve straightened your entire head, apply a smoothing serum or anti-frizz spray. This seals the outer layer of your hair and locks in moisture. Products like Moroccanoil Treatment (£25–30) or the cheaper Frizz-Ease Dream Curls Serum (£5) work well. A small amount—about a few drops rubbed between your hands—is all you need.
Humidity Control
On humid days, your straightened hair will fight to return to its natural curl. If it’s June or July and you’re in a humid area, a humidity-blocking spray is your best friend. Products like Bumble and bumble Straight Blow Dry (£30) create a protective layer against moisture. These sprays work by coating the hair with polymers that repel humidity.
In winter months (November to February), humidity is lower, so your straightened style will last longer—sometimes 3–5 days. In summer, expect 1–2 days of smooth hair before frizz creeps back in.
Overnight Maintenance for Multi-Day Wear
Want your straightened hair to last until your next wash? Sleep on a silk or satin pillowcase instead of cotton. Silk creates less friction, so your curls are less likely to bounce back overnight. A silk pillowcase costs £10–20 and saves you heat styling each morning.
Alternatively, loosely braid your hair or wrap it in a silk scarf before bed. In the morning, you can quickly touch up any frizz with a straightener on low heat or smooth flyaways with a smoothing serum.
Care Tips After Straightening
Heat styling stresses your hair. Support it with these practices:
- Deep condition weekly: Use an intensive mask once a week to replenish moisture and strength.
- Trim every 6–8 weeks: Removes damaged ends and keeps your hair looking fresh.
- Avoid back-to-back heat styling: If you straightened your hair on Monday, skip blow-drying or curling until Wednesday.
- Use a hydrating shampoo and conditioner: Sulfate-free formulas are gentler and retain more moisture.
- Take breaks: Alternate weeks where you wear your hair naturally curly. This gives your hair recovery time.
Frequently Asked Questions
How long does straightened curly hair last?
Heat-straightened hair lasts until your next wash—typically 3–5 days in winter, 1–2 days in humid summer months. Humidity, moisture, and sleep patterns affect longevity. Sleeping on a silk pillowcase extends wear time by a day or two.
Will straightening permanently damage my curls?
One-off straightening doesn’t permanently damage healthy curly hair if you use proper heat protection and don’t exceed 200°C. However, frequent straightening (multiple times weekly for months) can weaken hair over time. Space out heat styling sessions and deep condition regularly to minimise damage.
Can I straighten my hair if it’s dyed or bleached?
Yes, but with extra care. Dyed and bleached hair is more delicate and porous. Use lower temperatures (150–170°C), apply heat protectant generously, and deep condition after every straightening session. Consider investing in a professional straightener with ionic technology, which reduces frizz and damage.
What’s the cheapest way to straighten curly hair at home?
A budget approach costs around £30–50: a basic ionic straightener (£30–40) and a heat protectant spray (£3–5). You’ll already have shampoo and conditioner at home. This is far cheaper than salon straightening, which costs £60–150 per session. However, investing an extra £30–50 in a mid-range ceramic straightener will give much better, more even results.
Can I straighten curly hair without heat?
Chemical relaxers, Japanese straightening treatments, or keratin blow-outs can straighten curly hair semi-permanently without daily heat styling. These cost £80–250+ and last 6–12 weeks. However, they’re permanent-to-semi-permanent changes, whereas heat straightening is reversible. For experimenting with straight hair, heat straightening is safer and more flexible.
Final Thoughts: Embrace Your Options
The best part about learning how to straighten curly hair is flexibility. You’re not locked into one style. Some days, wear your natural curls. Other days, sleek straight hair. This versatility is something people with permanently straight hair don’t have—use it to your advantage. Master the technique, invest in decent tools, and you’ll achieve salon-quality results at home for a fraction of the cost. Your curls will thank you for the care you take in the process, and you’ll feel confident switching up your look whenever the mood strikes.