
How to Lighten Hair at Home: Safe Methods for Beautiful Results
Contents:
- Understanding Your Starting Point: Hair Type and Colour Matters
- Chemical Lightening Methods: What Works and What to Avoid
- Box Dyes and Lightening Kits
- Powder Bleach and Developer Systems
- Lightening Shampoos and Semi-Permanent Options
- Natural Lightening Methods: Gentler Alternatives
- Lemon Juice and Sunlight
- Chamomile Tea Rinse
- Cinnamon Paste
- Seasonal Timeline: When to Lighten Your Hair
- Step-by-Step Application Guide for Chemical Lightening
- Common Mistakes to Avoid
- Aftercare: Maintaining Your Lightened Hair
- Troubleshooting: When Things Don’t Go as Planned
- Brassy or Yellow Tones
- Uneven Lightening
- Excessive Breakage or Mushy Hair
- Allergic Reaction
- Budget-Friendly vs Premium Options: Comparing Costs
- Professional Help: When to Visit a Stylist Instead
- Frequently Asked Questions
- How long does it take to see results from home lightening?
- Can I lighten my hair if it’s been dyed black?
- How often can I lighten my hair safely?
- What’s the difference between lightening and bleaching?
- Will lightening damage my curly hair?
- Your Hair Lightening Journey Starts Now
Did you know that over 75% of people who want to lighten their hair explore at-home options first? The demand for DIY hair lightening has transformed dramatically, with countless salon-quality products now available at a fraction of the cost. Whether you’re chasing a sun-kissed blonde, adding subtle highlights, or dramatically changing your look, you can achieve gorgeous results without stepping foot in a salon.
The safest way to lighten hair at home involves using quality peroxide-based dyes (starting at 20 volume developer), natural methods like lemon juice for subtle lightening, or semi-permanent lightening shampoos. Always do a patch test 48 hours before application, protect your skin with petroleum jelly, and follow product instructions precisely. Results depend on your starting hair colour and natural texture.
Understanding Your Starting Point: Hair Type and Colour Matters
Before you begin any lightening process, understanding your hair’s current state is crucial. Your hair’s natural colour, texture, porosity, and previous chemical treatments all influence how lightening products will perform.
Hair colour exists on a scale from Level 1 (black) to Level 10 (lightest blonde). If you’re currently at Level 3 or 4 (dark brown), lightening to Level 8 or 9 (light blonde) may require multiple applications or professional-grade products. Finer hair tends to lighten more easily than coarser hair, while previously bleached or coloured hair may respond unpredictably. Test a small hidden section first—this strand test costs nothing and prevents disasters.
Porosity also matters tremendously. High-porosity hair (damaged or previously processed) absorbs colour quickly and may lighten faster but unevenly. Low-porosity hair resists lightening and may require longer processing times. You can test porosity by dropping a clean strand into water; it sinks if high-porosity, floats if low-porosity.
Chemical Lightening Methods: What Works and What to Avoid
Box Dyes and Lightening Kits
Box dyes remain the most accessible option, with prices ranging from £4 to £15 depending on brand and formula. L’Oréal Casting Crème Gloss and Schwarzkopf Palette are popular UK choices offering decent results for beginners. These kits include developer, lightening cream, and sometimes conditioning treatments.
The developer strength matters significantly. 10 volume developer lifts colour gently (1–2 shades), 20 volume lifts 2–3 shades, 30 volume lifts 3–4 shades, and 40 volume (rarely recommended for home use) lifts 4+ shades. Higher volumes mean faster processing but increased damage risk. Most home kits use 20 or 30 volume developers.
Application is where most mistakes happen. Section your hair into four quadrants using clips. Start applying mixture at the roots where processing is slowest, working towards the mid-lengths and ends last. Wear old clothes, use a non-metal bowl, and apply petroleum jelly along your hairline to prevent staining. Set a timer—typically 30–45 minutes depending on your hair and desired lightness. Check progress every 5 minutes after the 25-minute mark.
Powder Bleach and Developer Systems
For more dramatic lightening, powder bleach systems offer stronger lifting power. Wella Koleston Perfect and Igora Royal (available at Boots and Superdrug, £8–£12) provide salon-quality results. These systems separate bleach powder and developer, giving you precise control.
Powder bleach requires more care than box dyes. Mix precisely according to instructions—typically 1 part powder to 2 parts developer. Process for 20–50 minutes depending on your starting colour and desired lift. The longer you leave it, the lighter you’ll become, but never exceed 45 minutes without rinsing, as over-processing damages hair severely. This method lifts 4–6 shades realistically.
Lightening Shampoos and Semi-Permanent Options
If you want something gentler, lightening shampoos provide subtle results with minimal damage. Davines Dede or Lee Stafford Bleach Blonde range (£5–£8) gradually lighten without harsh chemicals. These work best on naturally lighter hair or previously lightened locks.
Semi-permanent lightening products like Schwarzkopf Gliss or Garnier Nutrisse sit between box dyes and semi-permanent colours. They lighten whilst conditioning, making them ideal if you’re nervous about damage. Expect 1–2 shades of lift with a glossy finish.
Natural Lightening Methods: Gentler Alternatives
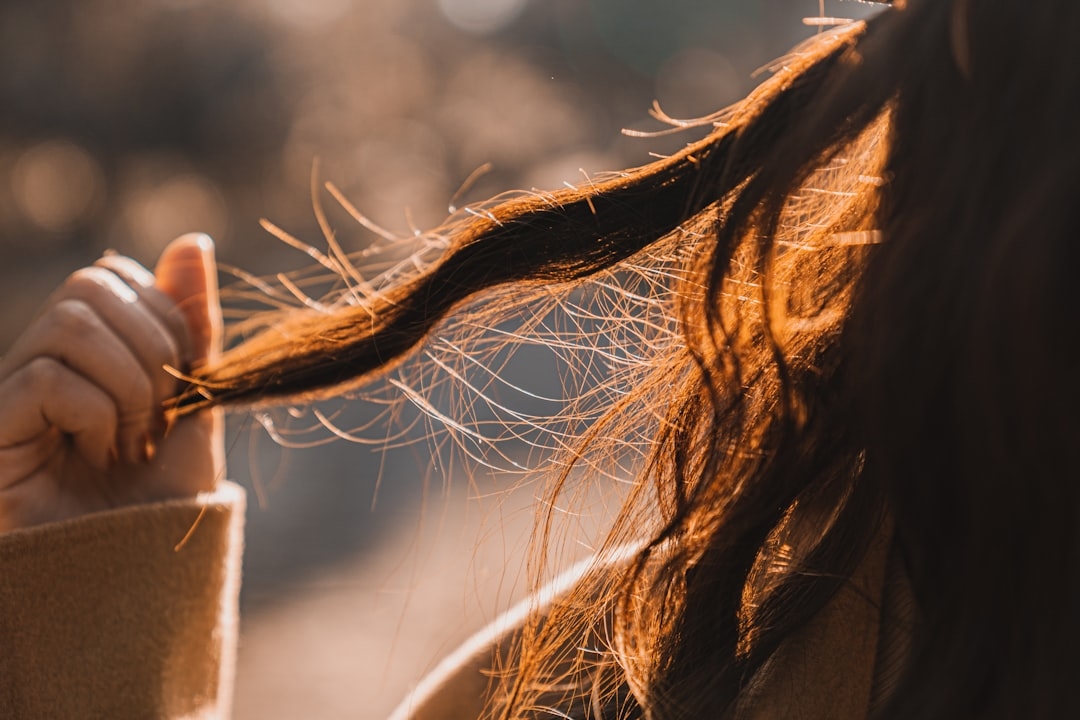
Lemon Juice and Sunlight
The combination of citric acid and UV rays creates a gentle lightening effect over time. Mix fresh lemon juice (not concentrate) with water in a 1:1 ratio. Spray generously onto hair, focusing on mid-lengths and ends. Spend 2–3 hours in direct sunlight. This works best on already light brown or blonde hair, lifting subtly (usually 0.5–1 shade).
Lemon juice can be drying, so always deep condition afterwards. Apply a moisturising mask for 15 minutes, or use a leave-in conditioner. Repeat this process weekly for cumulative lightening. Results appear gradually over 3–4 weeks of consistent application.
Chamomile Tea Rinse
Chamomile contains compounds that naturally lighten hair. Brew 5–6 chamomile tea bags in 500ml of water for 15 minutes. Let cool, then use as a rinse after shampooing. You can also spray it onto damp hair and sit in the sun for 2–3 hours weekly. This extremely gentle method works best on lighter hair and produces subtle honey tones rather than dramatic lightening.
Cinnamon Paste
Ground cinnamon mixed with conditioner creates a paste that gradually lightens and adds warm tones. Mix 1 cup of conditioner with 3–4 tablespoons of ground cinnamon. Apply to damp hair, cover with a shower cap, and leave overnight or for 8+ hours. This method requires patience—results appear after 2–3 weeks of weekly applications—but produces beautiful reddish-golden tones without damage.
Seasonal Timeline: When to Lighten Your Hair
Timing your lightening strategically improves results and protects your hair throughout the year.
Spring (March–May): Ideal for lighter, sun-kissed looks. Natural UV rays support gradual lightening whilst your hair recovers from winter damage. If planning summer holidays, begin lightening in March for optimal results by June.
Summer (June–August): Perfect for maintenance lightening and natural methods. Sunlight boosts lemon juice and chamomile effectiveness. Avoid harsh chemical lightening if you’ll be swimming regularly, as chlorine can turn blonde hair green.
Autumn (September–November): Good for subtle refreshes before winter when you’ll wear hats. Chemical lightening is safer when you’re less exposed to intense sun.
Winter (December–February): Avoid aggressive lightening during harsh weather when hair is driest. Instead, focus on maintenance and gentle natural methods. Winter’s lower UV intensity makes natural lightening less effective anyway.
Step-by-Step Application Guide for Chemical Lightening
- Prepare your workspace: Gather everything you need—gloves, old towel, non-metal bowl, applicator brush, petroleum jelly, sectioning clips, timer, and developer. Have a sink or shower ready for rinsing.
- Protect your skin: Apply petroleum jelly along your hairline, ears, and neck. Wear old clothes or a protective cape. Put on gloves before mixing.
- Mix the product: Combine lightener and developer according to package instructions. Use exact ratios—eyeballing amounts causes uneven results. Stir thoroughly for 30–60 seconds until smooth and consistent.
- Section your hair: Divide into four quadrants using clips and a comb. This ensures even coverage. Create sections about 2.5cm wide.
- Apply systematically: Start at the roots where processing is slowest. Use the applicator brush to saturate each section. Work section by section, ensuring every strand is thoroughly coated. Move to mid-lengths, then ends last (ends process faster and need less time).
- Monitor progress: Set a timer for the recommended time. After 25 minutes, check a small section by rinsing and examining under natural light. Hair should feel slightly gummy but not mushy.
- Rinse thoroughly: Rinse with lukewarm water until water runs clear. Use cool water for the final rinse to seal the cuticle. This takes 3–5 minutes.
- Condition intensely: Apply the provided conditioner or a deep conditioning treatment for 5–10 minutes. This restores moisture and seals colour.
- Dry and style: Gently squeeze excess water with an old towel. Air dry or use a cool setting on your hair dryer. Avoid heat for 48 hours if possible.
Common Mistakes to Avoid
Over-processing: Leaving lightener on longer than recommended burns hair, creating straw-like texture and breakage. Follow the timer. You can always lighten more next week; you can’t undo severe damage.
Applying to wet hair: Wet hair dilutes the lightening mixture, reducing effectiveness. Always apply to clean, damp (not soaking) hair for optimal results.
Using hot water to rinse: Hot water opens the hair cuticle and releases colour. Always rinse with cool or lukewarm water only.
Skipping the strand test: A 48-hour patch test prevents allergic reactions. Test behind the ear or on your inner arm. Also perform a strand test on hidden hair to check how your specific hair will react.
Lightening multiple times in one week: Patience is essential. Space lightening sessions at least 7–10 days apart. Multiple applications in quick succession cause severe damage and breakage.
Ignoring your hair’s condition: Dry, damaged hair lightens unevenly and breaks easily. Deep condition weekly for 2–3 weeks before lightening. Skip lightening if your hair is already compromised.
Aftercare: Maintaining Your Lightened Hair
Lightened hair demands more maintenance than your natural colour. Chemical lightening opens the hair cuticle, making it porous and prone to dryness.
Weekly deep conditioning: Use a protein-rich mask like Olaplex No. 3 (£28) or a budget option like Schwarzkopf Bonacure (£6) for 15–20 minutes once weekly. This rebuilds structure and prevents breakage.

Hydrating shampoo and conditioner: Invest in a purple-toning shampoo if you’re now blonde—this neutralises brassy tones. Fanola No Yellow (£8–£10) and Lee Stafford Bleach Blonde (£5) work well. Regular shampoo strips colour and moisture; use colour-safe formulas instead.
Limit heat styling: Blow dryers and straighteners accelerate moisture loss. Air dry when possible. If you must use heat, apply a heat protectant spray first (£4–£8).
Trim every 6–8 weeks: Lightened hair develops split ends faster. Regular trims (£20–£40 at local salons) keep your look fresh and prevent damage from spreading up the hair shaft.
Avoid chlorine: If you swim, wet your hair with fresh water and apply conditioner first. This creates a barrier against chlorine absorption. Alternatively, wear a swimming cap.
Troubleshooting: When Things Don’t Go as Planned
Brassy or Yellow Tones
This happens when lightening doesn’t reach your target shade or toner fades. Purple-toning shampoos neutralise these warm tones. For intense brassiness, use a toner like Wella T18 or T14 (£6–£8 online) mixed with 20 volume developer. Process for 20–30 minutes. This is a gentle second pass that deposits cool tones without damage.
Uneven Lightening
Patches of different shades usually result from uneven application or hair section size. Identify the lighter patches and apply lightener there next time, leaving darker areas untouched. Wait 10 days before attempting correction to avoid over-processing.
Excessive Breakage or Mushy Hair
This indicates over-processing. Stop lightening immediately. Focus entirely on deep conditioning—use Olaplex, K18, or similar protein treatments daily for 2 weeks. Cut damaged ends. Hair grows about 15cm per year, so patience is essential. Do not lighten again until hair recovers (minimum 4 weeks).
Allergic Reaction
Stop use immediately and rinse thoroughly with cool water. If itching, swelling, or rash develops, see a GP. Allergies to PPD (a common lightener ingredient) can develop after years of use. In future, perform a 48-hour patch test before every application, even if you’ve used the product before.
Budget-Friendly vs Premium Options: Comparing Costs
Budget options range from £4–£8 and work surprisingly well for first-time lightening. Superdrug and Boots own-brand dyes are quality-checked and effective. L’Oréal Casting Crème Gloss (£5–£7) produces consistent results.
Mid-range products (£10–£20) include brands like Schwarzkopf Professional and Wella Koleston. These offer more control, better conditioning agents, and slightly more dramatic lift.
Premium options (£25–£40) like Igora Royal or professional Olaplex systems provide salon-quality results and superior conditioning. Olaplex No. 3 (£28) is a post-lightening treatment that rebuilds hair bonds, significantly improving texture and strength.
For most people, mid-range products offer the best value. You avoid harsh budget formulas whilst staying well below salon prices (which typically charge £80–£200+ for lightening services).
Professional Help: When to Visit a Stylist Instead
Home lightening works brilliantly for lifting 2–4 shades or maintaining existing colour. However, certain situations demand professional expertise.
If you’re moving from dark brown to platinum blonde, a stylist’s technical knowledge and professional-grade products produce better results. Multiple sessions spread over weeks are safer than aggressive home lightening. Stylists also handle corrections if something goes wrong.
If your hair is previously damaged, colour-treated, or chemically processed, a consultation with a professional ensures your hair can handle lightening safely. They might recommend protein treatments before any lightening.
If you’ve had an allergic reaction or your hair shows signs of severe damage, definitely see a professional. They can assess damage level and recommend recovery treatments before attempting further lightening.
Costs for professional lightening typically range from £80–£200 depending on hair length and desired lift, plus £15–£30 for toning. This seems expensive compared to £10 box dyes, but accounts for stylist expertise, professional products, and the virtual guarantee of good results.
Frequently Asked Questions
How long does it take to see results from home lightening?
Chemical lightening produces immediate results—you see the difference within hours. Natural methods like lemon juice or cinnamon require 2–4 weeks of weekly applications for noticeable lightening. Semi-permanent lightening shampoos show subtle results after 2–3 weeks of regular use.
Can I lighten my hair if it’s been dyed black?
Yes, but it’s challenging. Black dye is permanent and sits deeply in the hair shaft. You’ll need a colour-stripping product first to remove the black dye, then use lightener. This requires two separate processes and damages hair significantly. Most stylists recommend growing out black dye or accepting a very dark brown as the lightest realistic result without professional intervention.
How often can I lighten my hair safely?
Space lightening sessions at least 10–14 days apart. This allows your hair to recover and prevents cumulative damage. If you’re using natural methods, weekly applications are safe. Chemical lightening more frequently than every 2 weeks risks severe breakage and mushy texture.
What’s the difference between lightening and bleaching?
Lightening refers to any method that lifts hair colour, including dyes and natural approaches. Bleaching specifically means using peroxide-based products that chemically break down existing colour. All bleach involves lightening, but not all lightening involves bleach. Semi-permanent dyes lighten without bleach, whilst powder bleach products do require bleach.
Will lightening damage my curly hair?
Lightening can affect curl pattern temporarily due to structural changes in the hair. Curls may loosen slightly or become frizzier. Deep conditioning after lightening helps restore curl definition. Consider doing a strand test on a hidden curly section to see how your specific hair reacts. If you have very tight, textured curls, professional lightening might be worth the cost to minimise damage and preserve curl pattern.
Your Hair Lightening Journey Starts Now
Learning how to lighten hair at home empowers you to transform your look affordably and conveniently. Start with a realistic assessment of your current hair colour and condition. If you’re lifting 2–3 shades, home lightening works excellently. If you’re making a dramatic change, consider a professional consultation first.
Begin with a strand test, gather quality supplies (spend £10–£25 for decent results), and follow instructions precisely. Deep condition before and after lightening. Space applications 10+ days apart. Protect your hair with weekly treatments and avoid excessive heat.
Natural methods like lemon juice and chamomile suit those who prefer gentleness and gradual change. Chemical lightening delivers faster, more dramatic results but requires more care. Neither approach is “better”—choose what matches your hair’s condition and your patience level.
Remember that hair grows about 15cm per year. If you make a mistake, you can cut it out and start fresh. This perspective removes pressure and makes the process more enjoyable. Give yourself grace, enjoy the experimentation, and don’t hesitate to consult a stylist if complications arise. Your hair—and your confidence—deserve the best outcome possible.